LBPH Algorithm
As LBP is a visual descriptor it can also be used for face recognition tasks, as can be seen in the following step-by-step explanation.
Steps of the algorithm:
- Parameters: the LBPH uses 4 parameters:
- Radius: the radius is used to build the circular local binary pattern and represents the radius around the central pixel. It is usually set to 1.
- Neighbors: the number of sample points to build the circular local binary pattern. Keep in mind: the more sample points you include, the higher the computational cost. It is usually set to 8.
- Grid X: the number of cells in the horizontal direction. The more cells, the finer the grid, the higher the dimensionality of the resulting feature vector. It is usually set to 8.
- Grid Y: the number of cells in the vertical direction. The more cells, the finer the grid, the higher the dimensionality of the resulting feature vector. It is usually set to 8.
2. Training the Algorithm: First, we need to train the algorithm. To do so, we need to use a dataset with the facial images of the people we want to recognize. We need to also set an ID (it may be a number or the name of the person) for each image, so the algorithm will use this information to recognize an input image and give you an output. Images of the same person must have the same ID. With the training set already constructed, let’s see the LBPH computational steps.
3. Applying the LBP operation: The first computational step of the LBPH is to create an intermediate image that describes the original image in a better way, by highlighting the facial characteristics. To do so, the algorithm uses a concept of a sliding window, based on the parameters radius and neighbors.

4. Extracting the Histograms: Now, using the image generated in the last step, we can use the Grid X and Grid Y parameters to divide the image into multiple grids, as can be seen in the following image,

5. Performing the face recognition: In this step, the algorithm is already trained. Each histogram created is used to represent each image from the training dataset. So, given an input image, we perform the steps again for this new image and creates a histogram which represents the image.
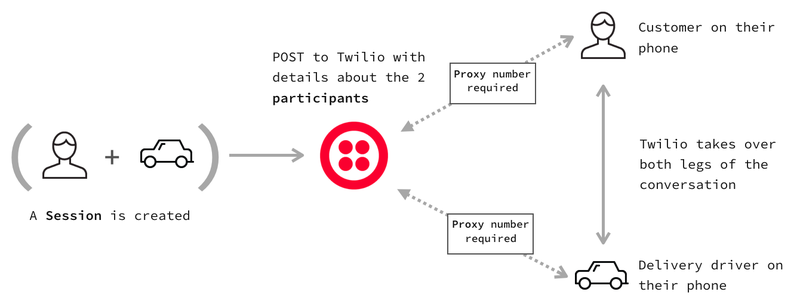
TWILIO API
Twilio is a cloud based Platform-as-a-Service platform. Twilio allows software developers to programmatically make and receive phone calls, send and receive text messages using its web service APIs.
Services provided by Twilio:
1.Allows to make calls from apps to landline and mobile devices.
2.Real time video collaboration infrastructure provides video collaboration and context sharing into web or mobile app.
3.Allows to send and receive SMS, MMS and IP messages globally from the web and mobile app.
4.Provides Two-factor Authentication service to strengthen and even replace traditional username and password login for websites, SaaS products and mobile apps. ¡American Red Cross, Uber, Ebay, Lenskart, Airbnb, Dell, Twitter, HackerRank are few among many customers Twilio has.

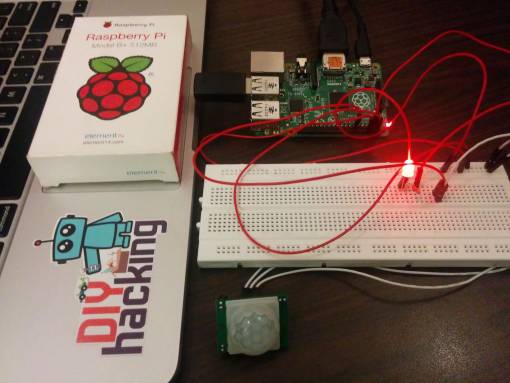
Integrating PIR Sensor with Raspberry pi(17/4/2020)

we are using a PIR motion sensor. PIR stands for passive infrared. This motion sensor consists of a fresnel lens, an infrared detector, and supporting detection circuitry. The lens on the sensor focuses any infrared radiation present around it toward the infrared detector. Our bodies generate infrared heat, and as a result, this heat is picked up by the motion sensor. The sensor outputs a 5V signal for a period of one minute as soon as it detects the presence of a person. It offers a tentative range of detection of about 6–7 meters and is highly sensitive. When the PIR motion sensor detects a person, it outputs a 5V signal to the Raspberry Pi through its GPIO and we define what the Raspberry Pi should do as it detects an intruder through the Python coding. Here we are just printing “Intruder detected”.
SMS Module using Twilio API(10/4/2020)
A SMS API is well-defined software interface which enables code to send short messages via a SMS Gateway.
As the infrastructures for SMS communications and the internet are mostly divided, SMS APIs are often used to ‘bridge the gap’ between telecommunications carrier networks and the wider web. SMS APIs are used to allow web applications to easily send and receive text messages through logic written for standard web frameworks.
As the number of developers with web experience outnumbers developers with a telecommunications focus, there is a huge demand for SMS APIs and Communications APIs that allow productivity from both worlds. Twilio’s Programmable SMS product offers a stable RESTful API and simple (yet powerful) features that bring telecommunications programming to the web domain.
Twilio offers both API endpoints which you can hit with any language, as well as a selection of Helper Libraries which help to build complex communications services into products in little time.

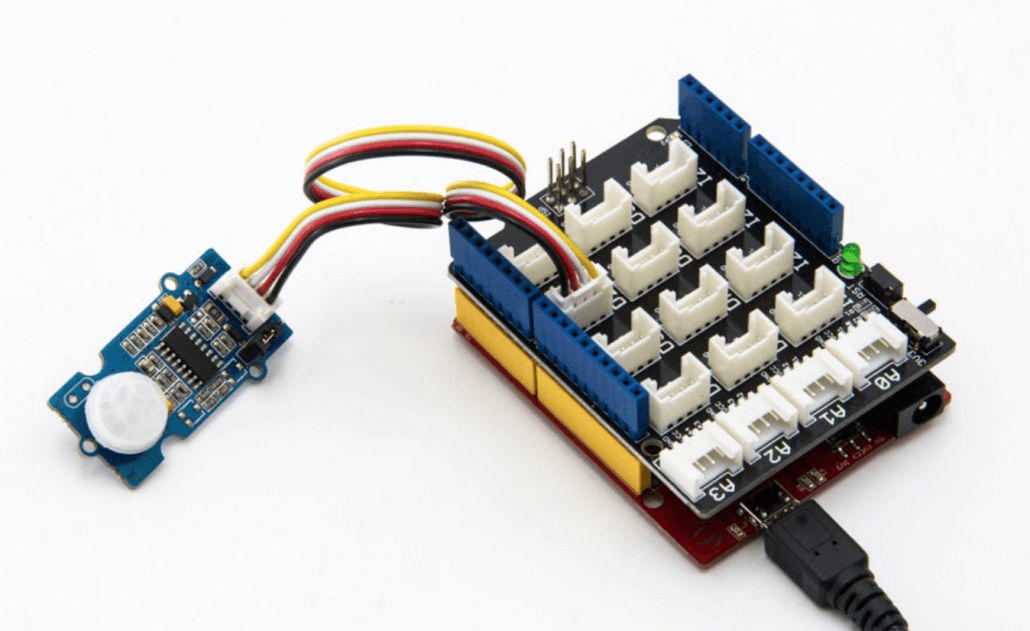
PIR SENSORS(3/4/2020)
PIR sensors are more complicated than many of the other sensors explained in these tutorials (like photocells, FSRs and tilt switches) because there are multiple variables that affect the sensors input and output.
The IR sensor itself is housed in a hermetically sealed metal can to improve noise/temperature/humidity immunity. There is a window made of IR-transmissive material (typically coated silicon since that is very easy to come by) that protects the sensing element. Behind the window are the two balanced sensors.

Generally, PIR can detect animal/human movement in a requirement range, which is determined by the spec of the specific sensor. The detector itself does not emit any energy but passively receives it, detects infrared radiation from the environment. Once there is infrared radiation from the human body/ particle with temperature, focusing on the optical system causes the pyroelectric device to generate a sudden electrical signal and an alarm is issued.
Raspberry Pi(27/3/2020)
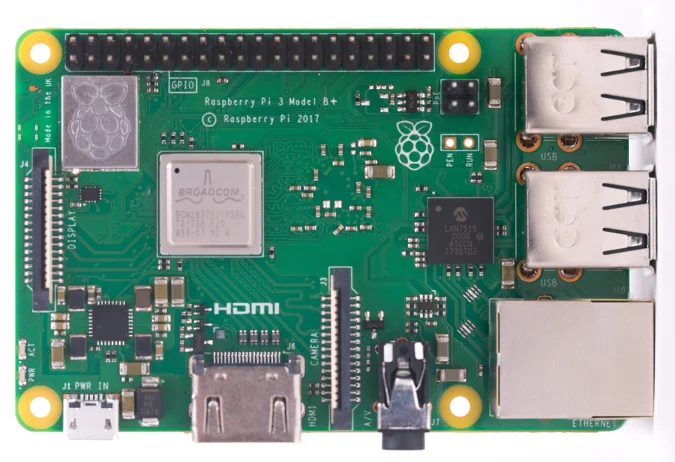
Raspberry Pi is the name of a series of single-board computers made by the Raspberry Pi Foundation, a UK charity that aims to educate people in computing and create easier access to computing education.
The Raspberry Pi launched in 2012, and there have been several iterations and variations released since then. The original Pi had a single-core 700MHz CPU and just 256MB RAM, and the latest model has a quad-core 1.4GHz CPU with 1GB RAM. The main price point for Raspberry Pi has always been $35 and all models have been $35 or less, including the Pi Zero, which costs just $5.

Connecting the camera
The flex cable inserts into the connector situated between the Ethernet and HDMI ports, with the silver connectors facing the HDMI port. The flex cable connector should be opened by pulling the tabs on the top of the connector upwards then towards the Ethernet port. The flex cable should be inserted firmly into the connector, with care taken not to bend the flex at too acute an angle. The top part of the connector should then be pushed towards the HDMI connector and down, while the flex cable is held in place.
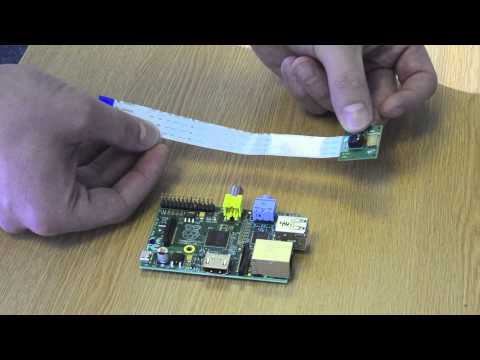
The camera may come with a small piece of translucent blue plastic film covering the lens. This is only present to protect the lens while it is being mailed to you, and needs to be removed by gently peeling it off.
Face recognition with OpenCV: Haar Cascade(20/3/2020)
Haar Cascade is a machine learning object detection algorithm. It is a machine learning based approach where a cascade function is trained from a lot of positive and negative images (where positive images are those where the object to be detected is present, negative are those where it is not).It is then used to detect objects in other images. Luckily, OpenCV offers pre-trained Haar cascade algorithms, organized into categories (faces, eyes and so forth), depending on the images they have been trained on.
The idea of Haar cascade is extracting features from images using a kind of ‘filter’, similar to the concept of the convolutional kernel. These filters are called Haar features and look like that:

The idea is passing these filters on the image, inspecting one portion (or window) at the time. Then, for each window, all the pixel intensities of, respectively, white and black portions are summed. Finally, the value obtained by subtracting those two summations is the value of the feature extracted.

We will obtain a significant value, hence the algorithm will return an edge feature with high probability.
Getting started with the Camera Module
Introduction
Learn how to connect the Raspberry Pi Camera Module to your Raspberry Pi and take pictures, record video, and apply image effects.

There are two versions of the Camera Module:
- The standard version, which is designed to take pictures in normal light
- The NoIR version, which doesn’t have an infrared filter, so you can use it together with an infrared light source to take pictures in the dark.
We presently using NOIR version,So that the pictures can be captured clearly of the intruder even in the dark envinornment.
Connect the Camera Module
Ensure your Raspberry Pi is turned off.
1.Locate the Camera Module port.
2.Gently pull up on the edges of the port’s plastic clip.
3.Insert the Camera Module ribbon cable; make sure the cable is the right way round.
4.Push the plastic clip back into place.
- Start up your Raspberry Pi.
- Go to the main menu and open the Raspberry Pi Configuration tool.

INTRODUCTION
This Project proposes the smart surveillance system using Raspberry Pi and PIR sensor. This system will serve as the smart security module for monitoring. Raspberry Pi camera module is used to capture images once the motion is detected by the PIR sensor and it checks for images that are already uploaded in the database and with the help of face recognition, alerts if the face detected is not stored in the database an email will be sent to the owner with the captured image and also a SMS is sent to the owner regarding the intruder. The proposed system is efficient and convenient for both office and home uses.
